

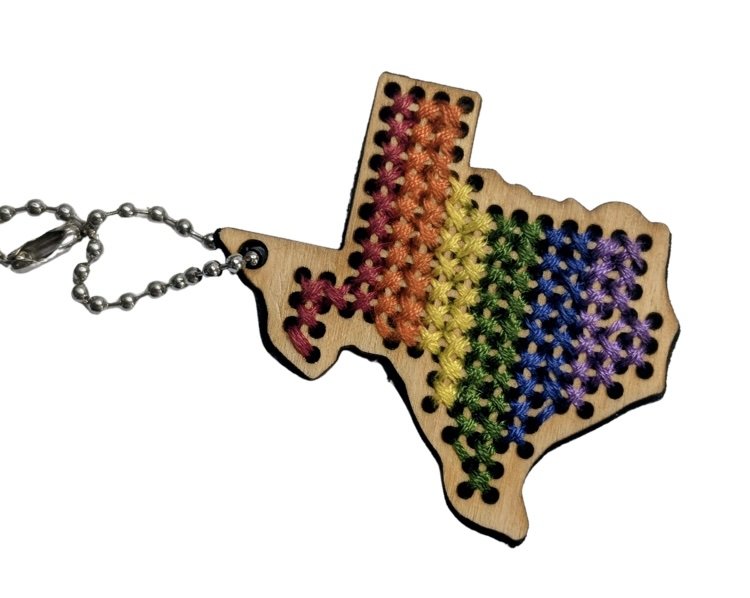

Pride Texas Keychain
You’ll be stitching a Pride Rainbow (or other design, see our alternative patterns at the end) across a wooden Texas shape, then adding felt and keychain hardware to finish it.
What’s in your kit
Wooden Texas shape
6 colors of embroidery floss (red, orange, yellow, green, blue, purple)
Needle
Felt backing piece
Keychain hardware (chain and keyring)

Instructions
Step 1: Prepare your floss
Embroidery floss comes as a bundle of 6 strands twisted together; you’ll stitch with 2 strands at a time.
If you’re using our Pride Rainbow Pattern, you’ll be starting with Red. See our suggested patterns after these steps.
Hold one end of one color of floss between your thumb and pointer finger, about one inch from the end.
With your other hand, gently pinch a single strand at the end and pull it straight up and out of the bundle.
The remaining strands may twist and curl, just smooth them gently with your fingers and they will relax.
Pull a second single strand the same way.
Lay those two single strands together so they act like one thicker piece of floss. This 2‑strand bundle is what you will stitch with.
Repeat this process each time you start a new color.
Step 2: Thread and fold the needle
Put both strands through the eye of the needle at the same time. It’s easier if the ends are crisp. Lick the thread or trim the ends so they are crisp.
Slide the needle down so there are a few inches of floss past the eye.
Fold the long tail back so the cut ends and the eye of the needle are on the same side, forming a long loop.
Tie a knot at the far end of the thread.
Step 3: Start your first stitch and secure the tail
In Cross-stitch, each X is a little box made of four holes: top‑left, top‑right, bottom‑left, bottom‑right
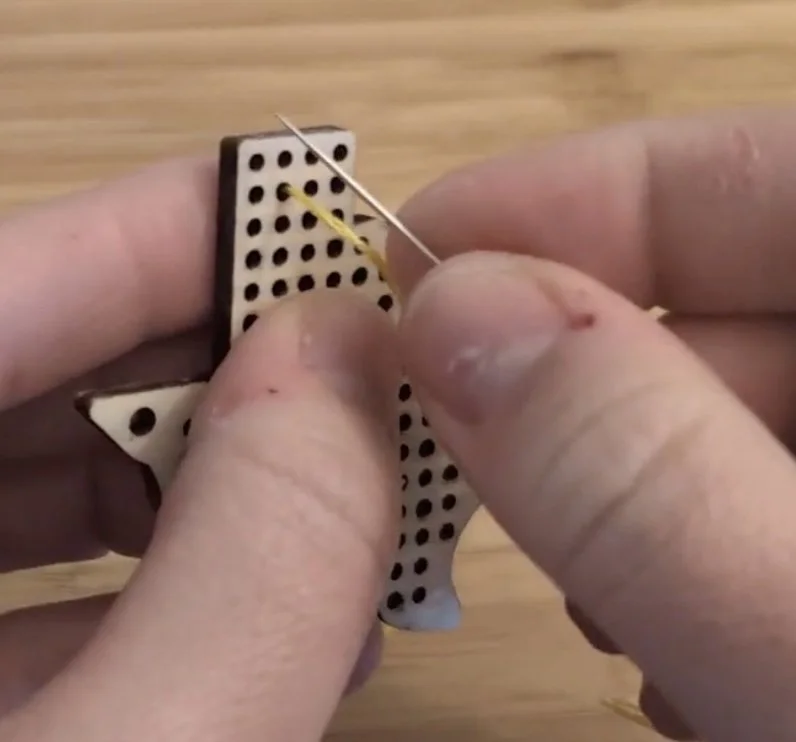
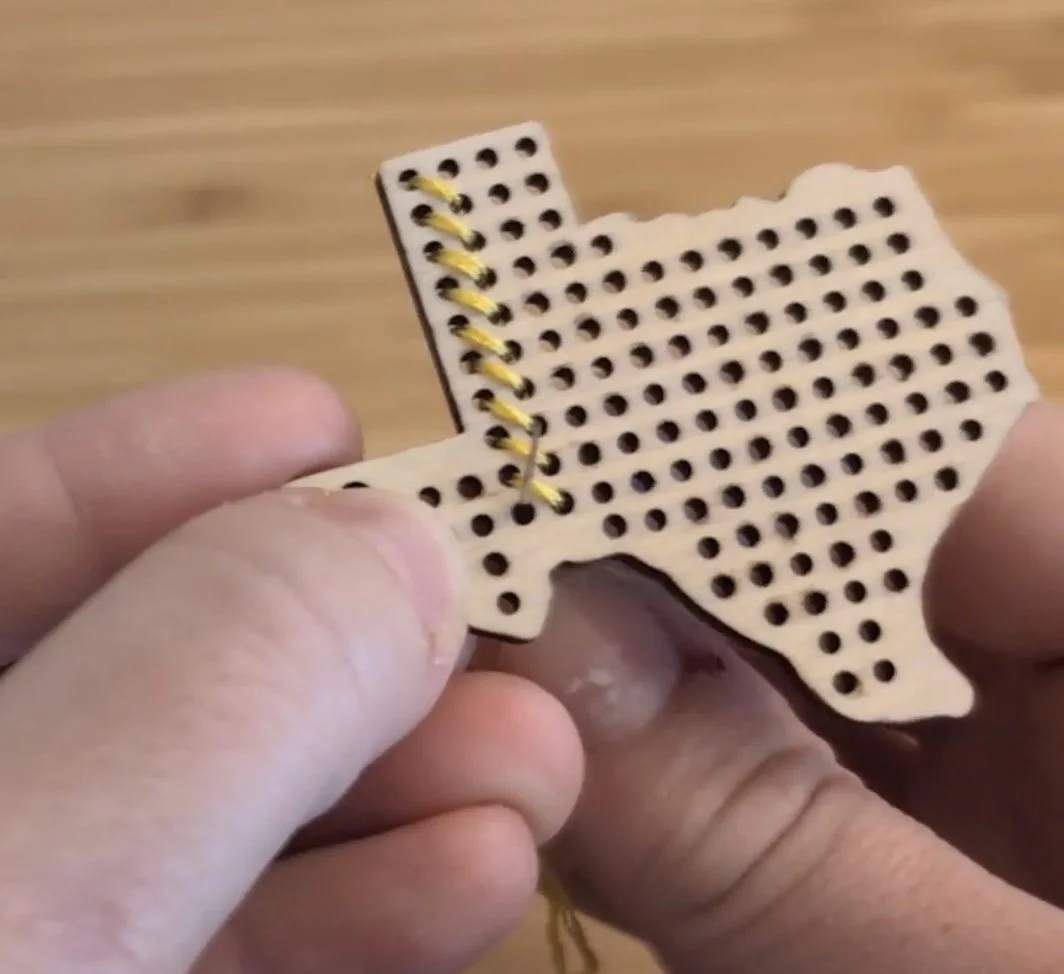
With the keyring hole on the left, start at the top‑left corner of the panhandle.
From the back of the wood, bring the needle up through the hole that is one hole down and one hole to the right. See photo.
Pull the needle until there is about 1 inch of floss tail on the back. Hold this tail flat with a finger from the hand holding the Texas.
Go down diagonally into the opposite corner (the top left hole of the panhandle) to make your first diagonal stitch on the front.
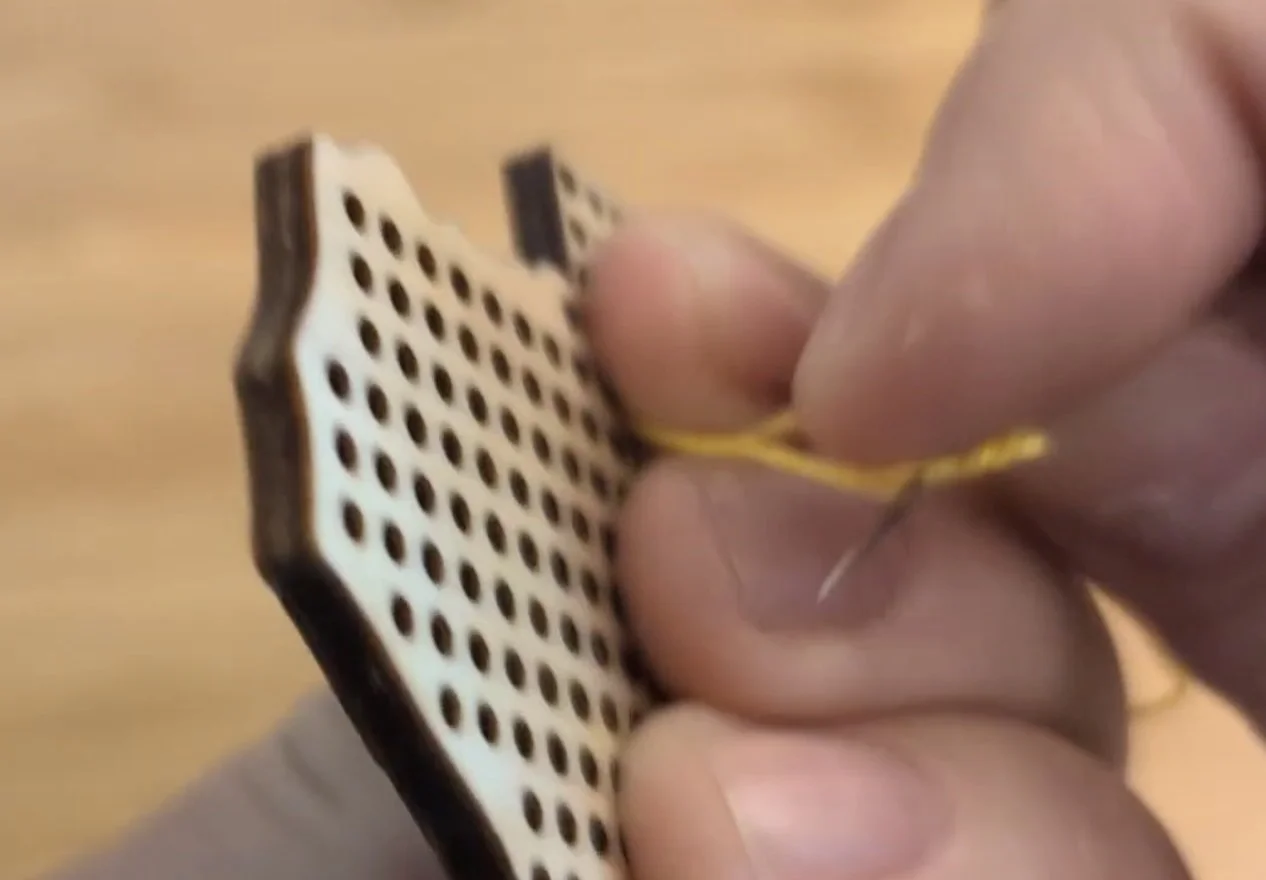
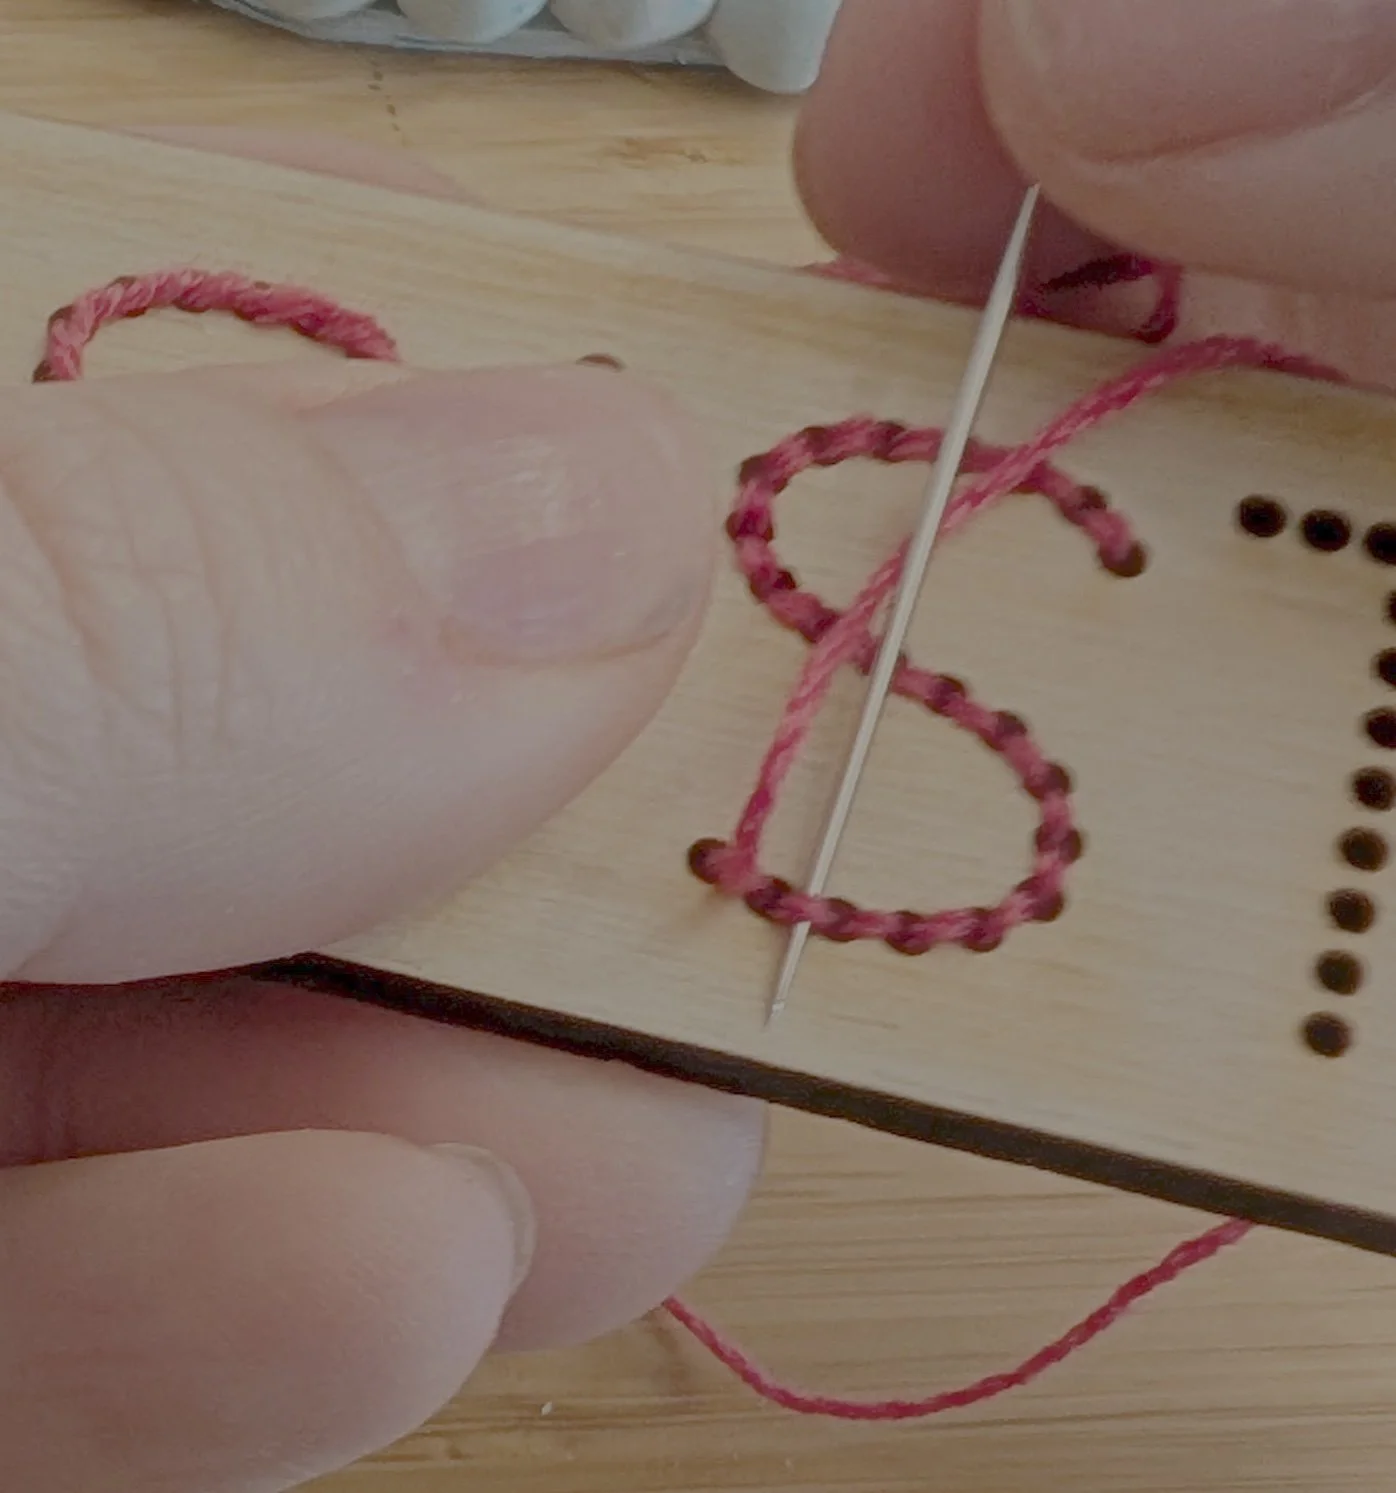
While on the back, feed your needle between the two strands of thread, right before the knot you made. See photo. Pull snug to secure your thread.
Step 4: Stitching a column
To create neat columns, work in one consistent direction at a time. This will mean you are making a column of slashes (\) and then turning up to cross them (/) into a full cross-stitch (X).
Bring the needle up at the bottom-right hole of your first box.
Go down at the top-left hole to make the first diagonal (\).
Come up just below the start of your first stitch (the bottom-right of the top X is the same hole as the top-right of the second X)
Continue making your column of diagonals
Bring the needle up at the bottom‑right of each box.
Go down at the top‑left of that same box.
When you reach the end of the column, turn around and go up, to complete the X’s:
Bring the needle up at the bottom‑left of each box.
Go down at the top‑right of that same box.
Tip: Gently snug each stitch so it lies flat.
Step 6: Cover the back with felt
Once all stitching is complete, check the back to make sure all floss ends are woven in and trimmed.
Lay the felt out flat, with the side facing up so that the shape is the correct orientation for Texas.
Add a thin even layer of glue (we recommend super glue, craft glue, E6000, or hot glue)
Place your finished Texas on top of the felt, lining it up with the outline.
Press firmly and let it dry completely.
Tip: Keep the keychain ‘face-up’ in this process so that gravity will not pull the glue onto the front of your design.
Step 7: Add the keychain hardware
Use the larger hole near the left edge of the Texas shape to attach the hardware.
Insert the chain through the hole
Add the keychain loop into the chain
Clip the end of the chain into its clasp.
Your Texas keychain is ready to clip onto your keys, backpack, or lanyard!
Step 5: Changing thread
If you need to change colors or if you only have a few inches of floss left:
Stop while on the back of the piece.
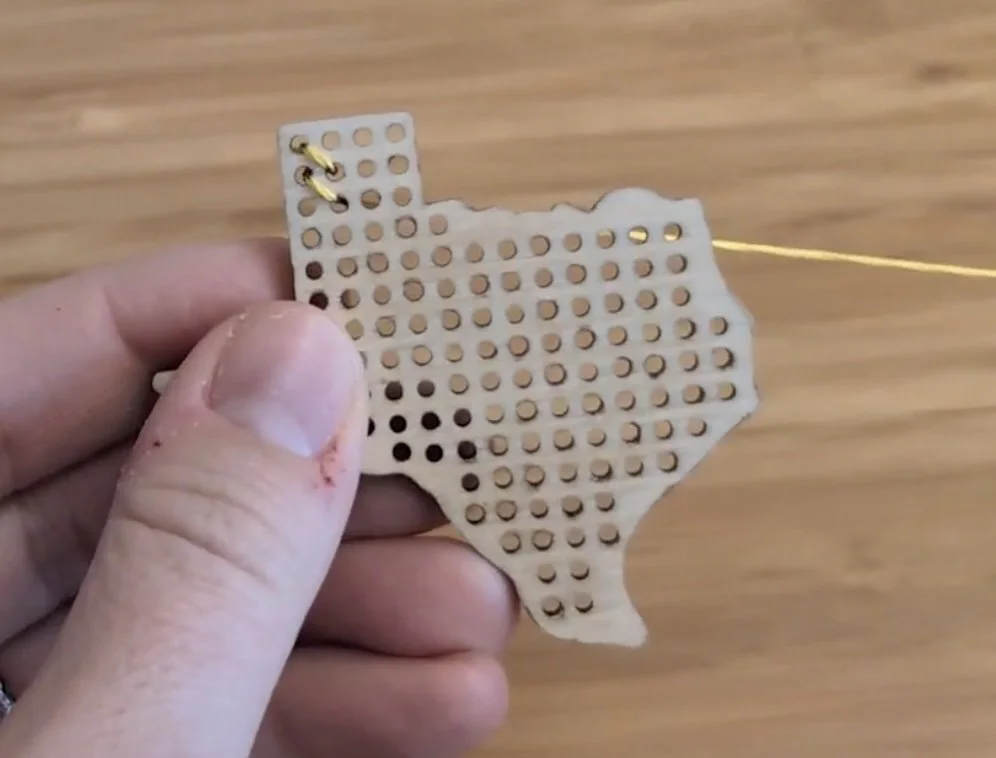
Weave the needle under several existing stitches on the back to secure the end, then trim close.
Prepare the next color by separating out two strands (Step 1), thread your needle (Step 2), and start up again (Step 3).
Repeat the same X‑stitch pattern until you’ve filled the whole Texas shape.
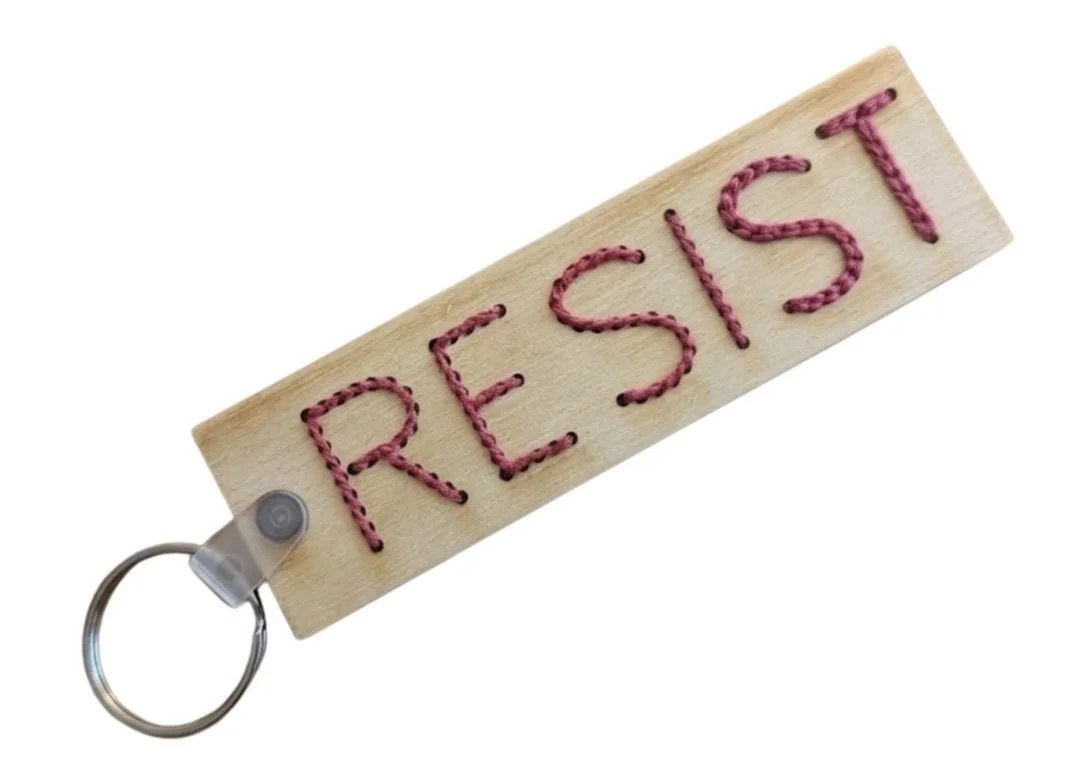
Resist Keychain
You’ll be stitching a rainbow (or other design) across a wooden rectangle, then adding felt and keychain hardware to finish it.
What’s in your kit
Wooden Rectangle shape
6 colors of embroidery floss (red, orange, yellow, green, blue, purple)
Needle
Felt backing piece
Keychain hardware (connector and keyring)
Instructions
Step 1: Prepare your floss
Embroidery floss comes as a bundle of 6 strands twisted together; you’ll stitch with 2 strands at a time.
If you’re using our Pride Rainbow Pattern, you’ll be starting with Red. Each letter will use a different color.
Hold one end of one color of floss between your thumb and pointer finger, about one inch from the end.
With your other hand, gently pinch a single strand at the end and pull it straight up and out of the bundle.
The remaining strands may twist and curl, just smooth them gently with your fingers and they will relax.
Pull a second single strand the same way.
Lay those two single strands together so they act like one thicker piece of floss. This 2‑strand bundle is what you will stitch with.
Repeat this process each time you start a new color.
Step 2: Thread and fold the needle
Put both strands through the eye of the needle at the same time. It’s easier if the ends are crisp. Lick the thread or trim the ends so they are crisp.
Slide the needle down so there are a few inches of floss past the eye.
Fold the long tail back so the cut ends and the eye of the needle are on the same side, forming a long loop.
Tie a knot at the far end of the thread.
Step 3: Start your first stitch and secure the tail
From the back of the wood, bring the needle up through the second hole, when counting from the top corner of a letter.
Leave about 1 inch of floss tail on the back. Hold this tail flat with a finger.
Go down into the first hole (so the corner of the letter).
While on the back, feed your needle though the thread before the knot you made. Pull snuggly to secure your thread.
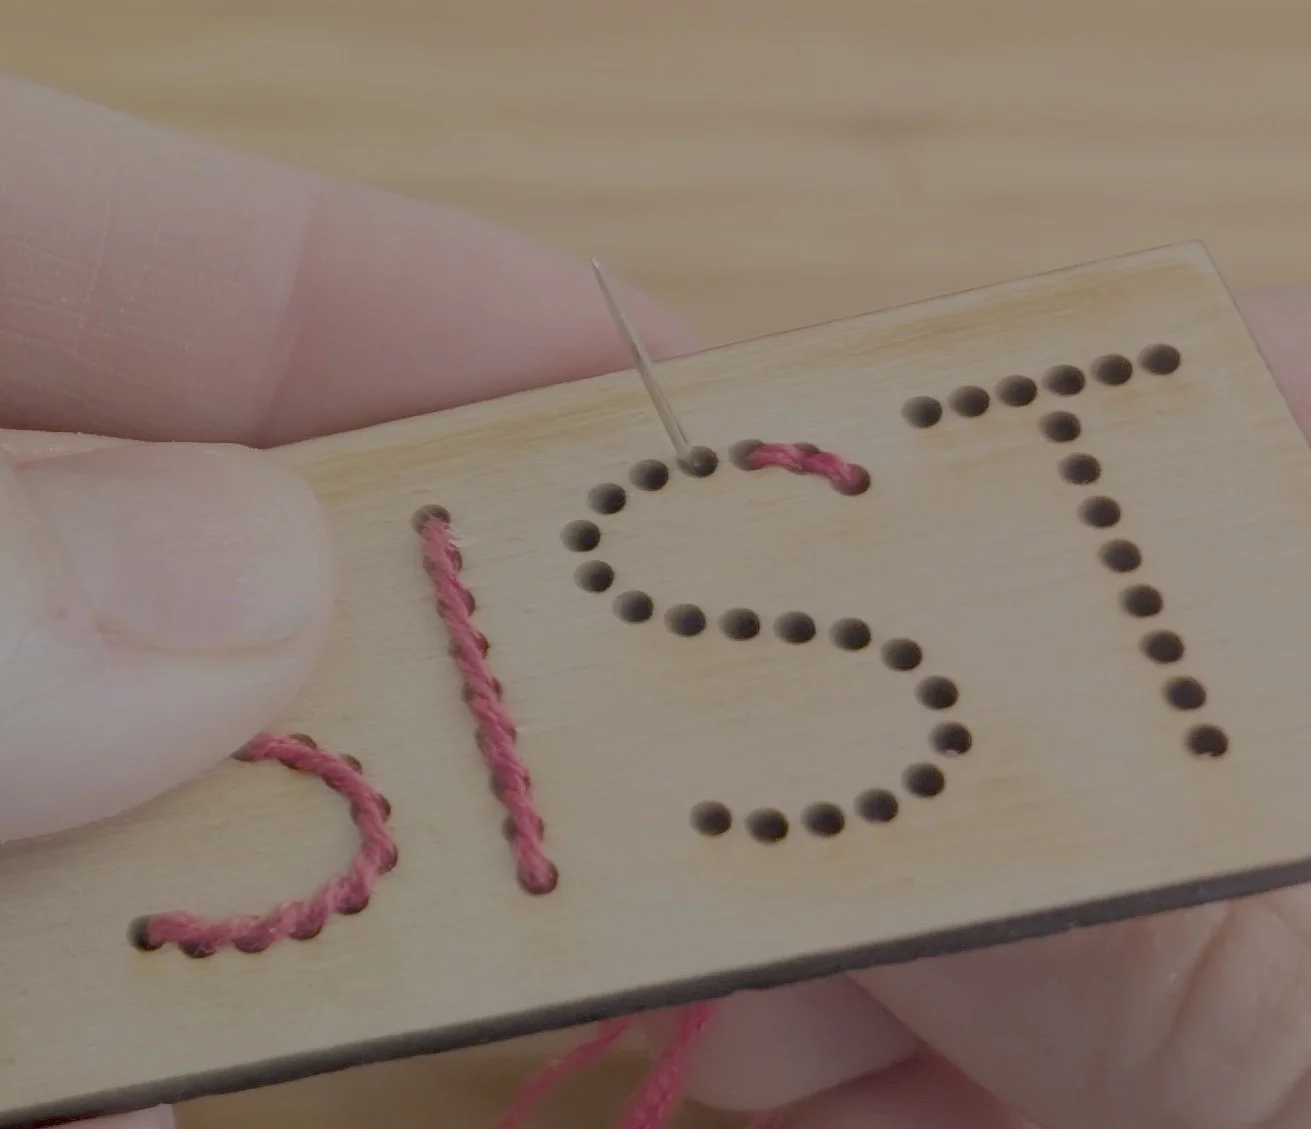
Step 4: Back Stitch
The back stitch gets its name because you stitch ‘back’ each time. You come up a hole away from where you last went down, and then close the gap by going ‘back’ and down.
Bring the needle up in the hole next to the hole with thread already there.
Put the needle down in the hole next to it, the one already with thread.
Repeat, moving down the letter.
Tip: Gently snug each stitch so it lies flat.
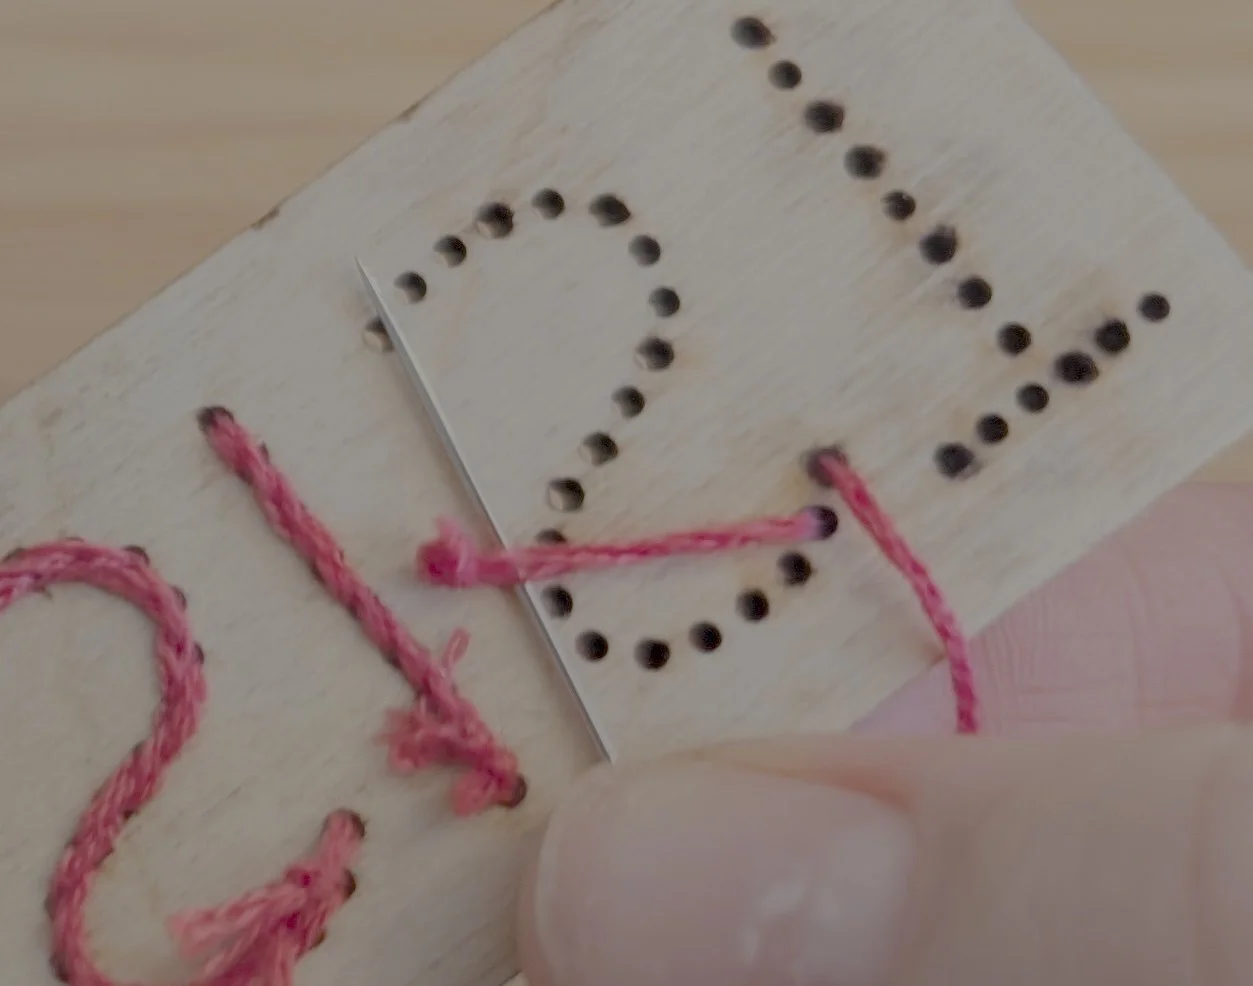
Step 5: Whipping the Back Stitch
When you finish the last stitch letter, go ahead and whip the back stitch before continuing. It will be easier to accomplish when the letter next to it is still bare of any thread.
Bring the needle up in the the final hole of a letter (this should be in the hole next to the one you just went down in
Working the needle underneath the stitch that connects the last two holes on your letter. Note the direction that you went (ex: top to bottom, along a horizontal stitch). Be careful to not catch your needle on any other completed stitches.
Pull firmly.
Using the same direction as before, work the needle under the next stitch.
Continue until you finish whipping each stitch of the letter. When you reach the end, simply insert the needle into the final hole, then follow the “changing thread” instructions to switch.
Step 6: Changing thread
If you need to change colors, if you finish whipping a letter, or if you only have a few inches of floss left:
Stop while on the back of the piece.
Weave the needle under several existing stitches on the back to secure the end, then trim close.
Prepare the next color by separating out two strands (Step 1), thread your needle (Step 2), and start up again (Step 3).
Step 7: Cover the back with felt
Once all stitching is complete, check the back to make sure all floss ends are woven in and trimmed.
Lay the felt out flat..
Add a thin even layer of glue (we recommend super glue, craft glue, E6000, or hot glue)
Place your finished Resist on top of the felt, lining the hole of the wood with the hole of the felt.
Press firmly and let it dry completely.
Tip: Keep the keychain ‘face-up’ in this process so that gravity will not pull the glue onto the front of your design.
Step 8: Add the keychain hardware
Tip! The plastic connector will not come ‘undone’ without breaking it. Make sure the keychain loop is inside the fold before you snap the two together!
Lay the plastic keychain connector on a flat surface, so that both nubs are facing up.
Lay the finished Resist on top, lining up that hole on top of the larger nub.
Lay the keychain loop across the keychain connector
Fold the connector, such that the smaller nub goes into the larger nub, which will trap the keychain loop inside the connector.
Press firmly until it clicks.
Your Resist keychain is ready to clip onto your keys, backpack, or lanyard!